ぽっちぽちにしてやんよ

技術ネタとかアプリに関する話とか

RubyMotion 1.8 リリースされてますね

リリース周期はやい!もう1.8が出てます.

$ sudo motion update 

しましょう!今回は修正が少なめです.

= RubyMotion 1.8 =

  * Fixed a bug in the generation of BridgeSupport files for multiple headers
    directories.
  * When building vendored projects, unset environment variables that could
    potentially make the build to fail.
    https://github.com/HipByte/motion-cocoapods/issues/12
  • 複数のヘッダディレクトリを指定したときのBridgeSupportファイル生成のとこのバグ修正
  • ベンダープロジェクトをビルドするときに環境変数CCが設定されてない時にビルド失敗する問題の修正.

いつも誰かがRubyMotionの新しいバージョン出たって言ってるの見てアップデートしてるのが分かるんだけど,言ってる人はどうやって新しいバージョンが出たって知るんだろう?毎日motion updateとかしてるのかな.

RubyMotion 1.7出てます

RubyMotion 1.7が出てました.

$ sudo motion update

しましょう!

ところで,RubyMotion がアップデートされたかどうかを素早く知る方法ってないんですかね.

= RubyMotion 1.7 =

  * Fixed a bug in the compiler where the proper signature would not be used
    when defining informal protocol methods with CF types as arguments.
  * Fixed iOS constants to be looked up at demand (when being used) and not
    when the app starts, because certain constants are not set until a certain
    API is called (ex: the kAB... constants of the AddressBook framework).
    This change should also speed up a little bit the app starting time.
  * Fixed a bug in the compiler where very long selectors would be truncated
    and causing exceptions later at runtime.
  * Fixed a bug in the compiler where memory-related selectors (alloc, dealloc,
    retain, release, etc.) could not be defined in Ruby.
  * Fixed a bug in the compiler where NSObject instance methods could not be
    called on classes (ex. MyClass.performSelector(...)).
  * Fixed a bug in the build system where vendored 3rd-party APIs dealing with
    types defined in iOS headers could not be used (ex: enums or structs).
  • 非公式プロトコルでCFタイプを引数にとった時に正しいシグネチャを吐かないことの修正
  • アプリ開始時のiOS定数発見の部分を修正.この影響でアプリ開始時間がちょっと早くなる.
  • 超長いセレクタが途中で切れて実行時エラーになる問題の修正
  • メモリ関係(allocとかreleaseとか)がRubyで定義出来なかったのを修正.
  • NSObjectのインスタンスメソッドをクラスから呼べなかった問題を修正
  • 外部ベンダのライブラリを読み込むやつでiOSヘッダに定義されたenumとかstructsが使われなかった問題を修正

[RubyMotion]Routableを使ってみた

Routableというgemがあるみたいという話を聞いて,使ってみました.

Routable - GitHub

インストール

gem install routable

Rakefileの編集

$:.unshift("/Library/RubyMotion/lib")
require 'motion/project'
require 'routable'

のようにrequire 'routable'を追加します.

使い方

class AppDelegate
  def application(application, didFinishLaunchingWithOptions:launchOptions)
    @window = UIWindow.alloc.initWithFrame UIScreen.mainScreen.applicationFrame
    @window.makeKeyAndVisible

    @rootView = NSBundle.mainBundle.loadNibNamed(
        'RootViewController',
        owner: self,
        options: nil).first

    @router = Routable::Router.router
    @router.navigation_controller = UINavigationController.alloc.init
    @router.navigation_controller.pushViewController(@rootView, animated: false)
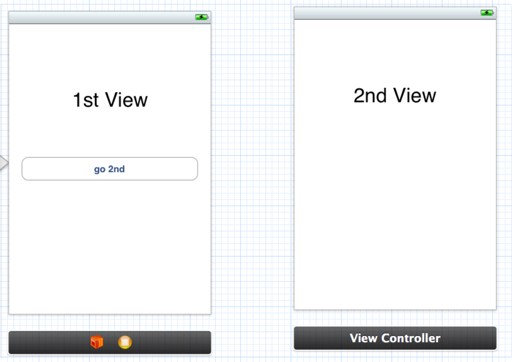
    @rootView.title = "TOP"

    @router.map("one", OneViewController)
    @router.map("two/:param", TwoViewController)

    @window.rootViewController = @router.navigation_controller

    @one = @rootView.view.viewWithTag 1
    @one.addTarget(
        self, 
        action: 'onClickOne:', 
        forControlEvents: UIControlEventTouchUpInside)

    @two = @rootView.view.viewWithTag 2
    @two.addTarget(
        self, 
        action: 'onClickTwo:', 
        forControlEvents: UIControlEventTouchUpInside)

    true
  end

  def onClickOne(sender)
    @router.open('one', true)
  end

  def onClickTwo(sender)
    @router.open('two/100', true)
  end
end

こんな感じで使います.

Routable::Router.routerを取得して,navigation_controllerUINavigationControllerを設定しておきます.

map(<URL>, <viewController>)のようにすると,そのURL文字列をキーにviewControllerの遷移を書けるようになります.

にはhoge/:idのようにパラメータを記述することができて,この場合だとhoge/1とかいう遷移をさせれば,宛先のviewControllerに1というパラメータが渡されます.

遷移する時はopen(<URL>, <animation?>)とすれば設定したviewControllerへ遷移出来ます.

遷移先ViewController

class TwoViewController < UIViewController
    attr_accessor :param

    def initWithParams(params = {})
        init()
        self.param = params[:param]
        self
    end

    def viewDidLoad
        @label = UILabel.alloc.init
        @label.bounds = [[50, 150],[300, 50]]
        @label.text = "TwoViewController" + self.param.to_s
    end
end

のようにして,initWithParamsで引数を受け取れます.

問題点

ViewControllerをコードで場所設定とかすごくめんどくさいので,僕はIBを使います.

しかし,IBを使ってresouces/HogeViewController.xibを作って,Controlを配置して,,,というフローを辿ってやると,router.openの時にエラーが出ます.

routerの内部では,HogeViewController.alloc.initWithParams()を呼んでインスタンス化しているわけですが, xibを使うと,NSBundle.mainBundle.loadNibNamedをしないとダメっぽいんですね.

なので,routerをいじって,mapするときにそれ用の情報を入れてあげるかしないといけません.

まとめ

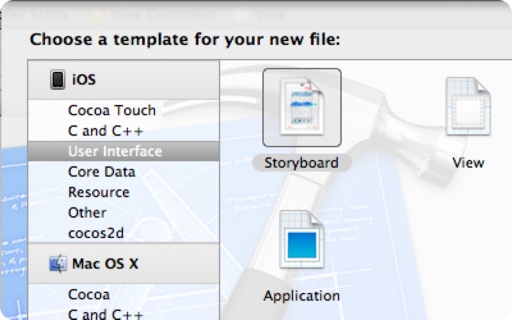
僕はStoryboardを使うと思います.

XCodeが嫌でRubyMotionをやっている人は多いと思うので,コードでControlを配置するのが苦じゃない人にとってはrouterはいいソリューションなんじゃないでしょうか.

[RubyMotion]motion-liveを使ってみよう

RubyMotionはrakeでBuildしてSimulatorが立ち上がります.

その後,Terminalはインタラクティブシェルになっていて,そこで行った操作がそのままSimulatorの方に反映されます.

ところが,そのインタラクティブシェルは1行しか打てなくて,そこで色々やろうとすると苦しいものがあります.

そこで登場するのがmotion-liveです.

motion-live

これを導入すると,LiveScratchpad.rbというファイルを編集してセーブしたタイミングでインタラクティブシェルに引き渡されて実行されます.

使い方

まず,motion-liveをインストールします.

$ gem install motion-live
Fetching: colored-1.2.gem (100%)
Fetching: rb-fsevent-0.9.1.gem (100%)
Fetching: motion-live-0.1.gem (100%)
Successfully installed colored-1.2
Successfully installed rb-fsevent-0.9.1
Successfully installed motion-live-0.1
3 gems installed
Installing ri documentation for colored-1.2...
Installing ri documentation for rb-fsevent-0.9.1...
Installing ri documentation for motion-live-0.1...
Installing RDoc documentation for colored-1.2...
Installing RDoc documentation for rb-fsevent-0.9.1...
Installing RDoc documentation for motion-live-0.1...

その後,プロジェクトのRakefileを編集します. (既存のmotion crateしたのがないなら,motion create <hoge>しましょう)

$ more Rakefile
$:.unshift("/Library/RubyMotion/lib")
require 'motion/project'
require 'motion-live'

Motion::Project::App.setup do |app|
  # Use `rake config' to see complete project settings.
  app.name = 'hoge'
end

変更点はrequire 'motion-live'を追加しただけです.

あとは,実行します.

$ rake live

するとSimulatorが立ち上がり,ディレクトリにLiveScratchpad.rbが出来上がるので,編集保存するとインタラクティブシェルで実行されます.

利点

motion-liveを使った時の利点です.

複数行のコードをインタラクティブシェルに読ませれる

これによって,何回も使う処理をclassとかmethodにして使うとかいうのも簡単にかけます.

自分の好きなエディタが使える

インタラクティブシェルではTerminalの上で書くので,補完も効かなければ,キーバインディングも違って色々不便です.

しかし,motion-liveを使うと,LiveScratchpad.rbというファイルを編集出来ればいいのです.

つまり,EmacsやVimも使えますし,補完を効かせれるTextMateやRedcarを使うことも出来ます. 前の記事で書いたようにSublime Text2も補完を効かせれるようになったので,僕はSublime Text2を使ってます.

app = UIApplication.sharedApplication
delegate = app.delegate
repl(delegate)
@window

みたいなのを書く時でも,すごい楽なわけです.

セットアップも有効にするのもRakefileに1行追加ですし,簡単で積極的に使って行きたいですね!

Sublime Text 2でRubyMotionの補完が出来るようになったぞおおおお

catch

ついに来ました!

いままで,RubyMotionを書いていて補完が効くのはVimとredcarとTextMateだけでした! ところが,RubyMotionのフォーラムに「[RubyMotion] Sublime Text 2 Support」という質問が投げかけられ,ついに今日そのパッケージが登場しました!

RubyMotionSublimeCompletions

インストール方法は簡単で,

$ cd ~/Library/Application Support/Sublime Text 2/Packages
$ git clone git://github.com/diemer/RubyMotionSublimeCompletions.git

してSublime Text2を再起動すればOKです.

PackageControlを導入している人なら,

Cmd+Shift+p
Package Control: Add Repository
https://github.com/diemer/RubyMotionSublimeCompletions
Package Control: Install Package
RubyMotionSublimeCompletions

でインストール出来るはずです.

後は,普通にエディタを起動してUIAppとか打てば,補完にUIApplicationとかUIAppearanceとか出るようになります!

AppReviewViewerが良い!

今日は「第2回 iphone_dev_jp 東京iPhone/Mac勉強会」に参加してきました.

そこで面白いものが紹介されていて,超便利だったので紹介します.

appreviews

mixiのiOSアプリ開発という発表をなさっていた@k_kinukawaさんがAppReviewViewerというツールを紹介されていました.

AppReviewViewer

これは,アプリのIDを登録すると,レビューページをスクレイピングしてどのバージョンでどんな評価が付いたかを一覧したり見やすく表示してくれるものです.

また,mecabが入っているとレビュー文を形態素解析してくれて頻出名詞をタグクラウドみたいに見せてくれたりします.

Gemfileが追加されたので,Gemfileを自分で追加する必要はなくなりました!

上記のgithubページに行ってもらうと分かりますが,依存ライブラリが書いてあるんですが,Gemfileが無くてめんどくさいので書きました.

AppReviewViewerをGithubからcloneした後に入れちゃってください.

$ git clone git://github.com/punchdrunker/AppReviewViewer.git
$ cd AppReviewViewer
$ cat > Gemfile
(上記gistを入れる)
$ bundle install
$ ruby app.rb

こんな感じでやれば,AppReviewViewerがhttp://localhost:4567に起動します.

左端に+Add appがあるので,選択してアプリのIDと名前を入れます.

appreviewsadd

ちなみにアプリのIDはAppStoreのアプリのページを開くと,

id

ココらへんに書いていたりします.

アプリのIDと名前が入れられたら,

$ ruby scripts/fetch.rb

とすれば,スクレイピングが始まるので,終わったら

$ ruby app.rb

としてまたhttp://localhost:4567を開いてみましょう.Reviewが見えるはずです!

RubyMotionが1.4->1.5->1.6とアップデートしたよ!

気づいたら,RubyMotionの更新が1.5・1.6と続いてありました.

$ sudo motion update

しましょう.

RubyMotion 1.5 更新内容

= RubyMotion 1.5 =

  * Improved the REPL to support multi-line expressions.
  * Fixed a bug when compiling Core Data model files where the `momc' utility
    was not given absolute paths.
  * Removed legacy MacRuby code that was using the private `isaForAutonotifying'
    selector and causing a warning during an App Store submission.
  * Fixed a bug in Enumerable#sort_by that would lead to a crash.
  * Fixed a bug in the REPL where it would not detect the iOS Simulator window
    if certain windows were in front or created later.
  * Fixed a bug in the build system where framework dependencies would not be
    properly handled.
  * Added support for .lproj directories (i18n). Thanks Aaron Hurley.
  * Fixed a bug where objects from pure Ruby classes sent to KVO would not be
    properly handled later (because KVO inserts a new singleton class).
  * Fixed attr_writer to emit KVO notifications (will/didChangeValueForKey).
  • REPLが複数行をサポート
  • CoreDataモデルファイルをコンパイル時のバグを修正
  • レガシーなMacRubyコードを撤去した.
  • Enumerable#sort_byがクラッシュを引き起こす問題を修正
  • ウィンドウがシミュレータウィンドウの前に複数あるなどの原因でREPLがシミュレータを見つけれないバグを修正
  • ビルド時にフレームワークの依存関係を正しく扱えなかったバグを修正
  • .lprojディレクトリをサポート
  • pure RubyのクラスのオブジェクトをKVOに送った時に正しくハンドリング出来なかったバグを修正
  • attr_writerがKVO notificationを上げるように修正

RubyMotion 1.6 更新内容

= RubyMotion 1.6 =

  * Fixed a regression in the build system introduced by the previous update
    (when compiling .xib files).
  * Fixed the vendoring system to include all source code files. Merged patch
    from https://groups.google.com/d/msg/rubymotion/tPCxSMCA2f4/w2DIHFo2AVAJ
  * Fixed the REPL to not crash if you give it an empty expression.
  • ビルド時の再発バグの修正
  • 外部ライブラリ読み込み不具合修正
  • REPLに空を渡した時にクラッシュする不具合の修正

RubyMotionでGCDを使う

GCD

今日はRubyMotionでGCD(Grand Central Dispatch)を使う話です.

GCD とは

GCDというのは,

非常に効率的なシステム機能と使い勝手のよいプログラミングモデルを併用して,マルチプロセッサを最大限に活用するために必要なコードを徹底的に簡素化

するものらしいです (AppleのGrand Central Dispatchの説明より)

UITableViewとかそういうのはMainThreadでちょっと重い処理をすると,すぐにパフォーマンスが悪くなってなんだこのアプリ糞だな!とか言われるので,そういう時には別Threadを立ててMainThreadの処理を邪魔しないように処理を行う必要があります. それを楽にしてくれるのがGCD.

Objective-C

Obj-Cのコードだと,

dispatch_queue_t queue = dispatch_get_global_queue(DISPATCH_QUEUE_PRIORITY_DEFAULT, 0);
dispatch_async(queue, ^{
    // 処理
});

こんな感じになります.

RubyMotion

RubyMotionでは,GCD関連はDispatchクラスを使います.

RubyMotion Runtime Guid にも書いてます.

上で書いたObj-CのコードをRubyMotionで書きなおすと,

Dispatch::Queue.concurrent.async{
    # 処理
}

こうなります.超簡単.

UIの更新に関して

さて,実際にはConcurrent Dispatch Queueで時間のかかる処理を行い, 処理を行った結果をUIに反映させることがよくあります. その場合に直接UIへ値を代入とかすると落ちます. UIはMainThreadから更新しなければなりません. その場合は,

Dispatch::Queue.concurrent.async{
    # 処理
    Dispatch::Queue.main.async{
        #UI更新
    }
}

このようにDispatch::Queue.mainでMain Dispatch Queueに更新処理を入れることで実現できます.

実戦

実際に少し書いてみます.

$ motion create gcd
$ cd gcd

app/app_delegate.rb

class AppDelegate
  def application(application, didFinishLaunchingWithOptions:launchOptions)
    @window = UIWindow.alloc.initWithFrame UIScreen.mainScreen.bounds
    @window.rootViewController = NSBundle.mainBundle.loadNibNamed(
        'RootViewController', 
        owner: self,
        options: nil).first
    @window.rootViewController.wantsFullScreenLayout = true
    @window.makeKeyAndVisible
    true
  end
end

InterfaceBuilder

resouces/RootViewController.xib という形でUIButton(Tag 2),UILabel(Tag 1)を追加しておいて下さい. (参考:[RUBYMOTION] INTERFACEBUILDERと合わせて使って楽をしよう

app/root_view_controller.rb

class RootViewController < UIViewController
    def viewDidLoad
        @label = view.viewWithTag 1
        @button = view.viewWithTag 2
        @button.addTarget(
            self,
            action: 'onClicked:',
            forControlEvents:UIControlEventTouchUpInside)
    end

    def onClicked(sender)
        p "onClicked"

        Dispatch::Queue.concurrent.async {
            NSThread.sleepForTimeInterval 5
            Dispatch::Queue.main.async {
                @label.text = ["hoge", "fuga", "moge"].sample
            }
        }
    end
end

実行

$ rake

シミュレータが立ち上がり,Buttonを押すとLabelの文字列がちょっと待ったあとに変わります. 連打すると次々変わると思います. その間Buttonが押せないとかそういうことが起こらないのが分かると思います.

Storyboardを使ってRubyMotionで開発する方法

RubyMotionでもStoryBoardが使えるらしいので,試してみた.

ひな形作成

$ motion create SB
$ cd SB

XcodeでStoryboardを作成

おもむろにXCodeを開きます.

File>New>FileiOS>User Interface>Storyboardを選びます.

初めに表示されるViewControllerを作成

UIViewController設置.

IdentifierをFirstとか付けます.

UILabelとUIButtonを追加します.

Segueで遷移する先のViewControllerを作成

もう一つUIViewController設置.

IdentifierをSecondとか付けときます.

Segueの設定

Firstに配置したButtonを,Ctrlを押しながら引っ張ってSecondのViewControllerへ繋ぎます. Storyboard Seguesの設定が出るので,Modalとかを選ぶ.

Storyboardの保存

Cmd+sでStoryboardをresources/Storyboard.storyboardとか名前を付けて保存します.

storyboardのコンパイル

$ ibtool --compile resources/Storyboard.storyboardc resources/Storyboard.storyboard

コーディング

app/app_delegate.rbを書く. Storyboardからロードします.

class AppDelegate
  def application(application, didFinishLaunchingWithOptions:launchOptions)
    @window = UIWindow.alloc.initWithFrame(UIScreen.mainScreen.bounds)
    @sb = UIStoryboard.storyboardWithName('Storyboard', bundle: nil)
    rvc = @sb.instantiateViewControllerWithIdentifier("First")
    @window.rootViewController = rvc
    @window.rootViewController.wantsFullScreenLayout = true
    @window.makeKeyAndVisible
    true
  end
end

ちなみに,Buttonの動作を変えたい場合などは,Firstと付けたUIViewControllerをCustom Classに変更してUIViewControllerを継承したクラスを作成して,prepareForSegue:sender:で遷移前に処理を行うとか,UIButtonのaddTarget:senderとかにselectorを登録して処理を行うとかします.

コンパイルして実行

  $rake

とすれば,Simulatorが立ち上がります. 設置したButtonを押せばSecondのViewへ切り替わります.